How to Setup a Baseline in TotaLite Platform
TotaLite measures deformation relative to a baseline, your Time Zero. No displacement graphs will appear until a baseline is defined. During baseline setup you identify the targets you want to track, name them, and assign each one a slope distance matching your field installation.
Starting the Baseline
Navigate to the "Project Page" and locate the device in the "Connected devices" section. Click "Setup baseline" to launch the wizard.
Note: The "Setup baseline" button only appears once data has been successfully collected by the sensor and processed in the cloud.
Step 1 — Select Start Date
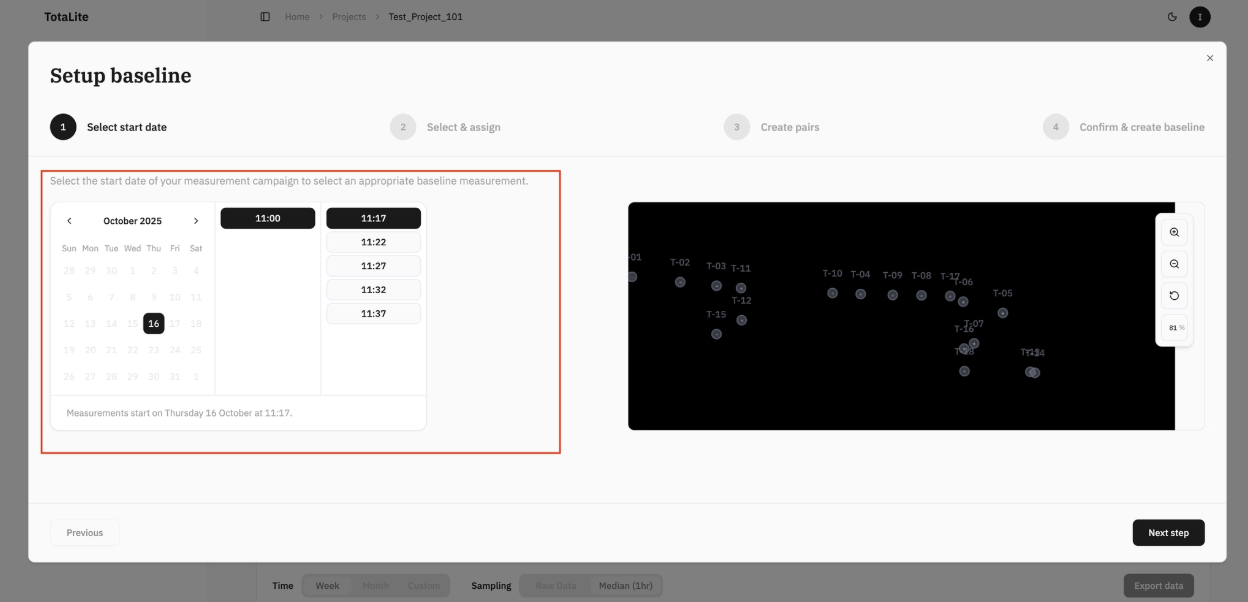
On the left side of the wizard, select a date and timestamp for your baseline measurement using the calendar. The corresponding infrared image will appear on the right, showing all potential target candidates in the sensor's field of view.
Once you can confirm all monitoring targets are visible in the image, click "Next step".
Step 2 — Select & Assign Targets
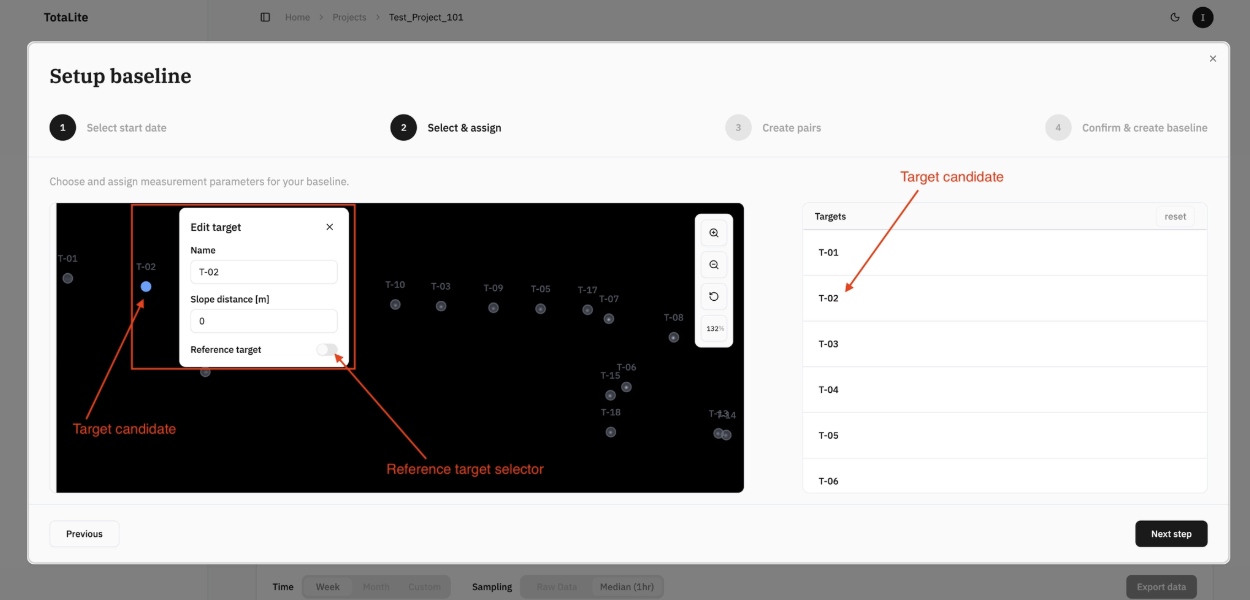
Click on any grey blob in the image, or its corresponding name in the target list on the right — to open the "Edit target" pop-up. For each target, assign:
- A "Name"
- A "Slope distance (m)"
- Whether it is a "Reference target"
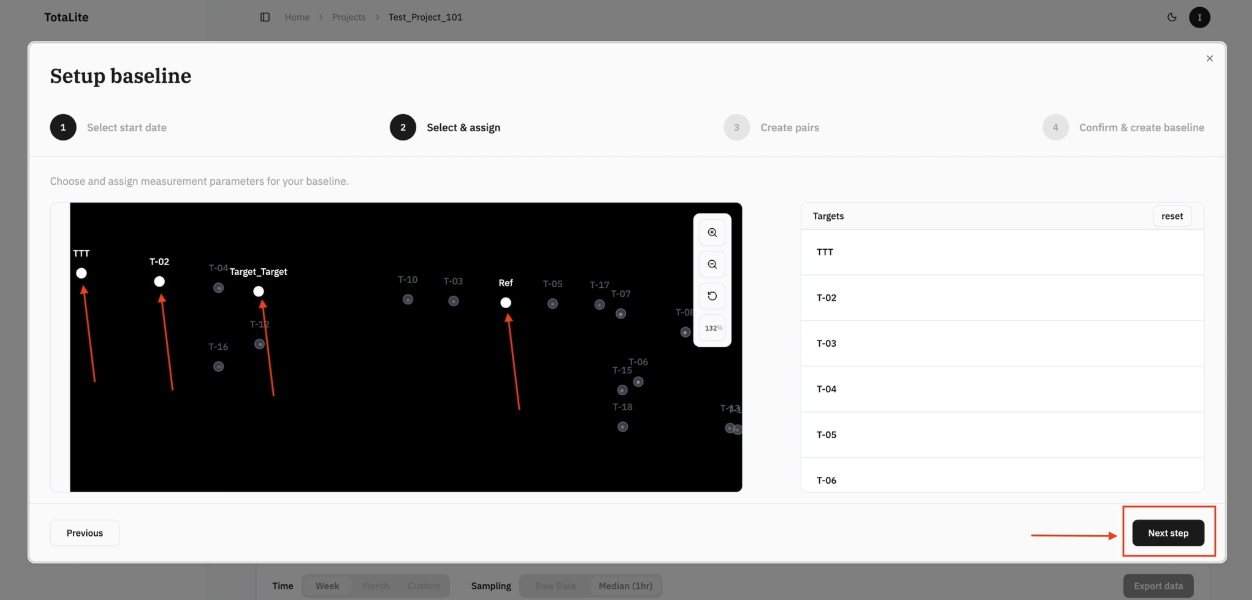
Selected targets turn blue when active and white once fully configured. When all targets are assigned, click "Next step".
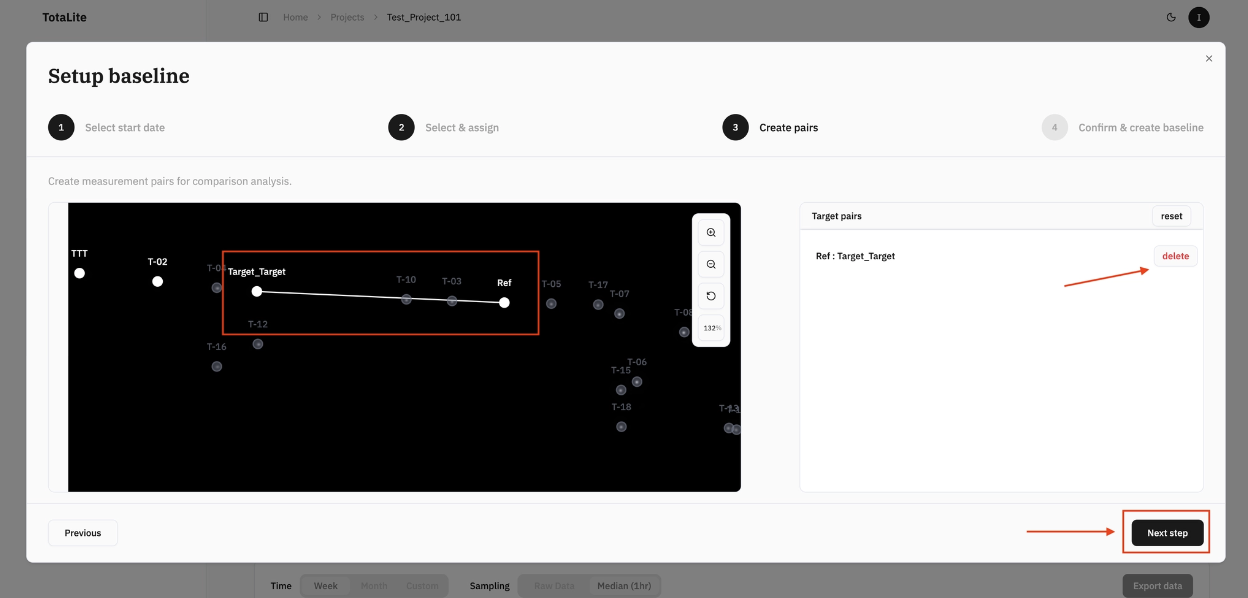
Step 3 — Create Target Pairs (Optional)
Target pairs measure relative displacement between two points, useful for cracks, tunnel convergence, and differential settlement. Select two targets to create a pair, a white line will appear between them. To remove a pair, click the "Delete" button next to it in the target pairs list. More about Target pairs here.
Skip this step if relative displacement measurements are not needed. Click "Next step" when done.
Step 4 — Confirm & Create Baseline
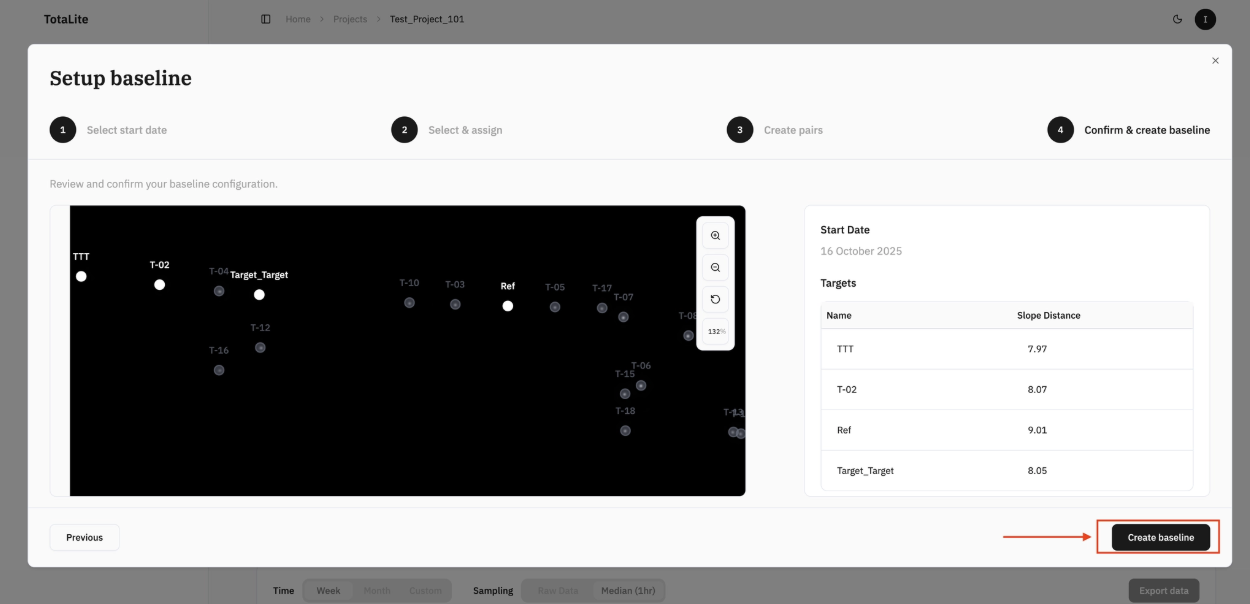
Review your configuration in the Confirm & create baseline section. When everything looks right, click Create baseline to save.
The baseline can always be edited later.